Create a WordPress Environment within Docker
Creating a WordPress Container with MYSQL and PhpMyAdmin installed.

If you’ve ever launched a WordPress site, or know someone that has, there is a level of difficulty associated with getting it up and running. However, if you’re like me– you search for easier ways to do the same tedious tasks.
Instead of traditional ways (launching a server, installing WordPress, etc.), I am going to show you how to create a local WordPress environment with MYSQL and PhpMyAdmin with docker, more specifically a docker compose file.
What is Docker?
Docker is a container-based platform, for highly portable workloads. It’s lightweight, fast and provides cost-effective alternatives to traditional virtual machines(VM). The difference is traditional VMs have host OS and guest OS inside, whereas docker containers host on a single physical server with a host OS, which shares amongst them. The benefit is with sharing the host OS between other containers, allows them to maintain a lightweight state and increases boot time.
Prior to getting started, I want you to be familiar with Docker lingo that’s going to be mentioned casually.
Terminology
docker run
creates a writable container layer over whatever image that’s specified.
docker pull
pulls an image or a repository from a registry
docker images
shows all top level images, their repository, tag and size.
docker ps
by default, this command only runs containers, if you want a modified version, use a subcommand.
docker network
this command manages networks.
docker-compose
by itself, it’s useless– but, when you leverage subcommands, you can build and manage multiple services in docker containers.
If you’re interested in conducting a deep dive on docker CLI lingo, visit https://docs.docker.com/engine/reference/commandline/docker/
Steps Before getting into the nitty-gritty, we need to visit docker hub and grab the image information for WordPress, MySQL, and PhpMyAdmin.
Visit hub.docker.com and search for WordPress, MySQL, and phpMyAdmin (follow screenshots below)
WordPress

MySQL

PhpMyAdmin

Although I prefer macOS, I am extremely fond of visual studio code as my code editor, so you will see screenshots from the code editor and their terminal feature.
First, we need to make a directory to host our docker file. Let’s call our directory “wordpress-docker-site”.

Next, we need to create the docker-compose.yaml file, by using the touch command.

Here are the contents of our docker-compose.yaml file

If you’re running an Apple M1 Chip, you will receive the following error.
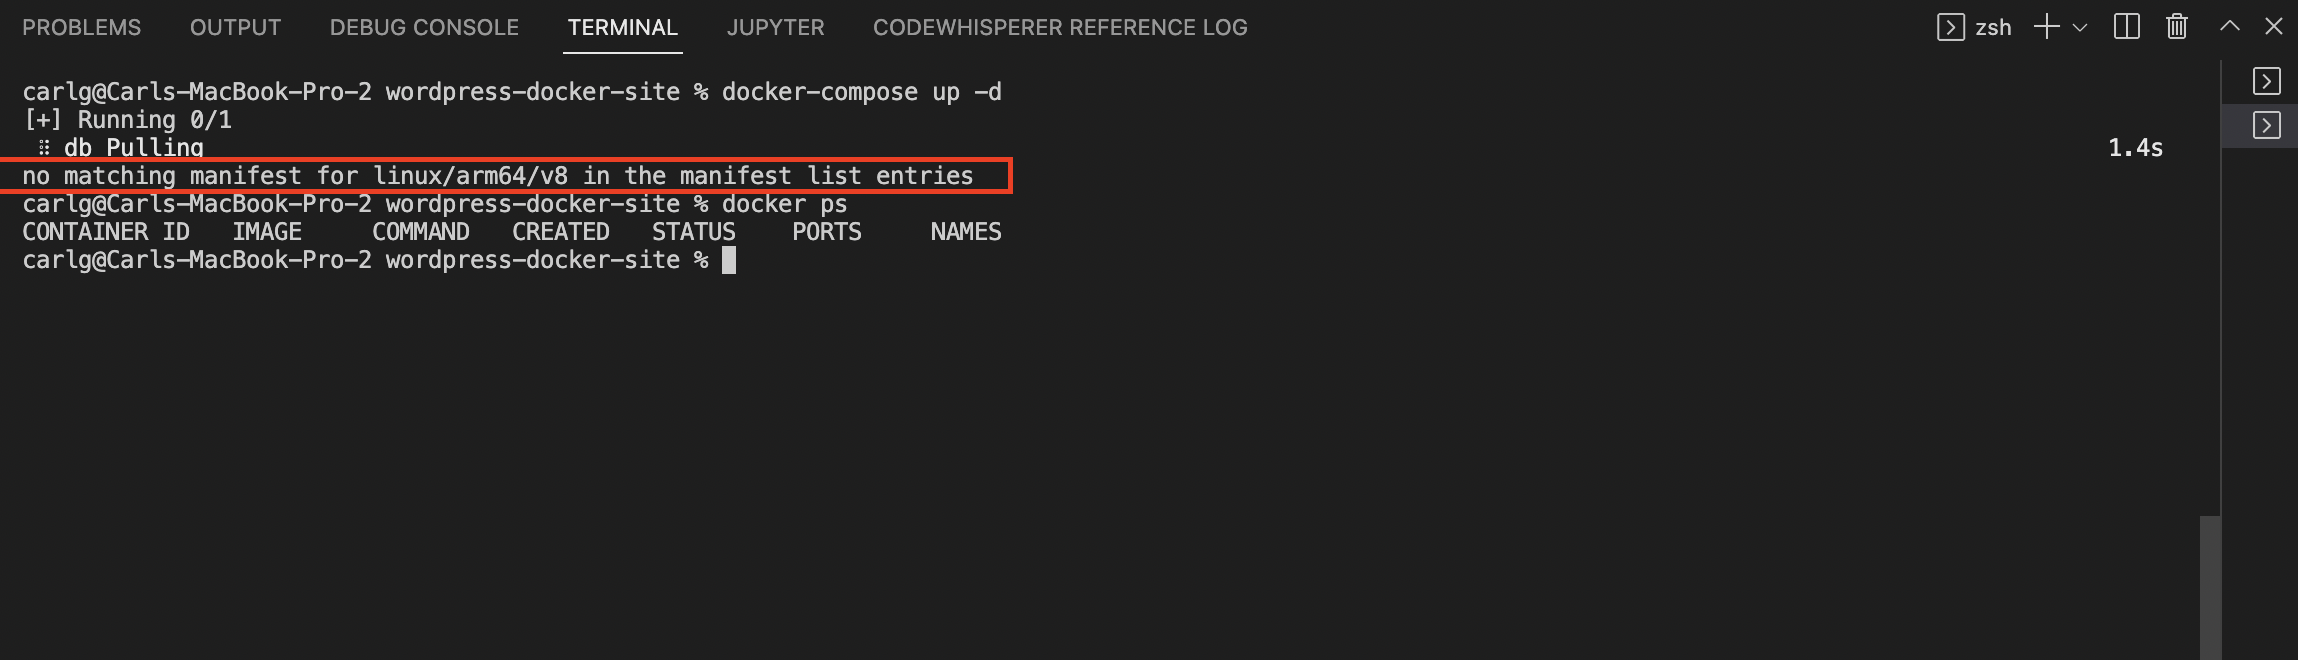
The work around for the time being is to run the following command from the terminal.

Or add services for the particular Linux edition under DB.

Run docker-compose up -d which will run the container in detached mode. At this moment, the services are starting to run, networks and volumes are also being created.

Run docker ps to see if we have two containers running. If you look closely, our WordPress container is mapped to port 8000. So we want to visit localhost:8000 and if we did everything correctly, we should see the WordPress setup page.

From here, we can proceed with the basic setup of WordPress.

Upon completion, we will receive confirmation that it was successfully done, then we can sign into the admin portal with our credentials and BAM!

We have successfully launched a WordPress site with a docker image!
From here we need to go back and configure our .yaml file to finish to include phpMyAdmin. The following needs to be added.

Lastly, run another docker-compose up -d , to run the container in detached mode.
Now, let's visit localhost:8080 and now we should be able to visit the phpMyAdmin login.

Enter “root” for the username, and “password” for the password. Then you should have access to the phpMyAdmin console.

To tear our lab down, please be sure to use the following command:
docker-compose down --volumes
If you’ve made it to the end of this lab and received the same results, congratulations!
If you experienced difficulties while following along, I encourage you to start the lab from the beginning to ensure you didn’t miss any required steps.
The link to the code used in this lab can be found on my GitHub: https://github.com/Carlghayes/wordpress-docker-site
